Panasonic SGOLD
Some Panasonic phones use Infineon hardware. The models for which internal photos are available are marked with a checkmark. The rest is filled in either from FCCID data or by best guess.
| Model | VS2 | VS3 | VS6 | VS7 ☑ | SA6 | SA7 ☑ | MX6 | MX7 |
|---|---|---|---|---|---|---|---|---|
| Photo |  |  |  |  | 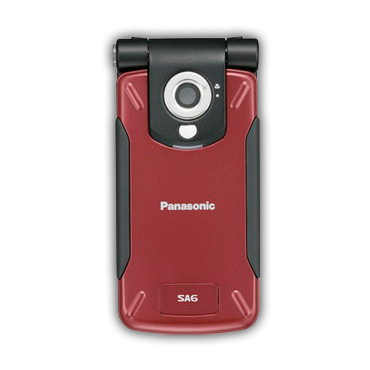 | 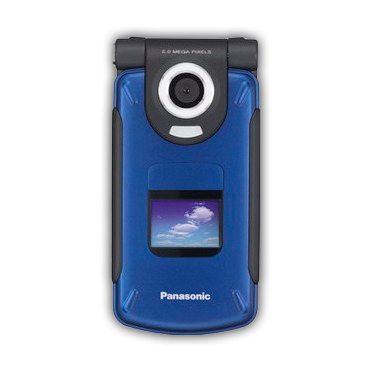 | 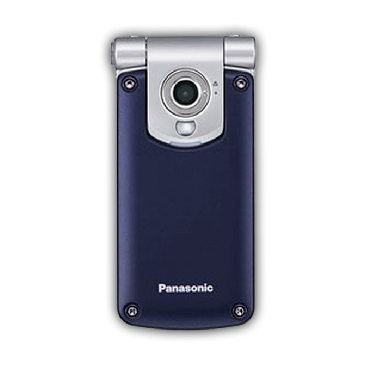 | 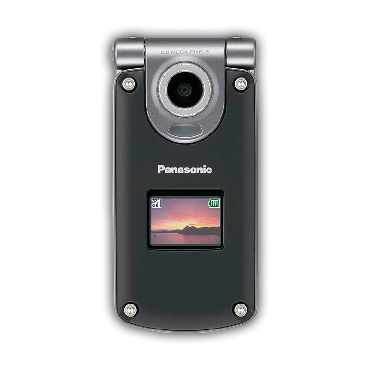 |
| FCCID | NWJ23C002A | NWJ26C001A | ||||||
| OS | APOXI | APOXI | APOXI | APOXI | APOXI | APOXI | APOXI | APOXI |
| CPU | PMB8875 | PMB8875 | PMB8875 | PMB8875 | PMB8875 | PMB8875 | PMB8875 | PMB8875 |
| POWER | ? | PMB6812 | ? | PMB6811 | ? | PMB6811 | ? | PMB6811 |
| RF | PMB6270 | PMB6270 | PMB6270 | PMB6270 | PMB6270 | PMB6270 | PMB6270 | PMB6270 |
| PAM | SKY77328 | SKY77328 | SKY77328 | SKY77328 | SKY77328 | SKY77328 | SKY77328 | SKY77328 |
| FLASH+RAM | 64/16: PF38F4460LVYTB0 | 64/16: PF38F4460LVYTB0 | 64/16: PF38F4460LVYTB0 | 64/16: PF38F4460LVYTB0 | 64/16: PF38F4460LVYTB0 | 64/16: PF38F4460LVYTB0 | 64/16: PF38F4460LVYTB0 | 64/16: PF38F4460LVYTB0 |
| Resolution&bit&size | 240x320x24, 2.2" | 240x320x24, 2.2" | 240x320x24, 2.2" | 240x320x24, 2.5" & 96x64x12 | 240x320x24, 2.2" | 240x320x24, 2.5" & 96x64x12 | 240x320x24, 2.2" | 240x320x24, 2.5" & 96x64x12 |
| LCD | ? | ? | ? | ? | ? | ? | ? | ? |
| GPU | S1D13756 | S1D13756 | S1D13756 | S1D13756 | S1D13756 | S1D13756 | S1D13756 | S1D13756 |
| BT | no | no | PMB8761 | PMB8761 | no | PMB8761 | no | PMB8761 |
| IrDA | yes | yes | yes | yes | yes | yes | yes | yes |
| Camera | 1.3 MP | 1.3 MP | 2.0 MP | 2.0 MP | 1.3 MP | 2.0 MP | 1.3 MP | 2.0 MP |
| Macro switch | Outer | Outer | Inner | Inner | Outer | Inner | Outer | Inner |
| Bat.cap. | 830 mAh | 830 mAh | 830 mAh | 830 mAh | 1660 mAh | 1660 mAh | 1660 mAh | 1660 mAh |
| Covers | Static | Changeable | Static | Changeable | Static | Static | Changeable | Changeable |
| Dimensions | 96x46x18.2mm, 98g | 96x46x17.6mm, 102g | 96x46x21mm, 101g | 102x51x18.8mm, 113g | 96x47x25mm, 127g | 102x53x26mm, 140g | 96x46x26mm, 130g | 102x51x26mm, 144g |
Checking the software version
- Turn on the phone without a SIM card.
- Quickly enter
*#9999#. - If nothing happens, the code was not entered quickly enough.
Connecting to a PC
This can be done in two ways:
- USB cable. Allows file transfer, use of PTEST mode, and dumping the contents of flash memory or RAM. It also allows a small amount of patching.
- UART cable. Used to work through Chaos boot from V_Klay and x65flasher.
- In theory, Bluetooth (if available) and IrDA, but this has not been tested by us.
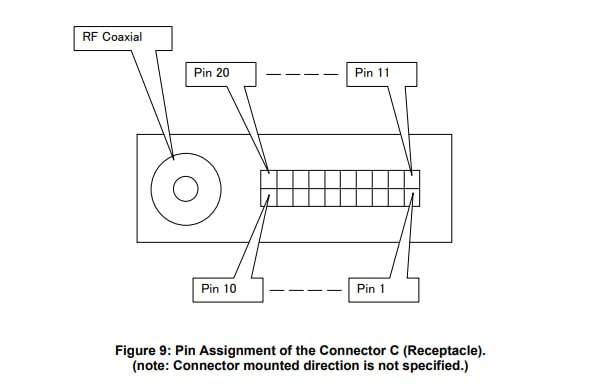
Phone connector
The connector on these phones is ARIB C.
UART pinout
| Gnd | Rx | Tx |
|---|---|---|
| 1 | 7 | 9 |
USB pinout
| Gnd | D+ (USB_DP) | D- (USB_DN) | +5V (usb_vbus+ext_per) |
|---|---|---|---|
| 1 | 2 | 3 | 4+5 |
Driver installation
The drivers from the manufacturer's disc work just fine. Download here - VS7SA7_Handset_Manager_USB.zip Tested on Windows XP and Windows 8.1 x86.
How to enter PTEST
PTEST - production test - is the phone's test mode. It is preferred for working with the phone in states not intended by the manufacturer. Press * and # at the same time, and while holding them, turn on the phone with the red button.

Service software
Infineon's own software called PhoneTool can be used. Versions 50 and 60 complement each other: in 60, the Audio tab and RAM read/write work; in 50, everything else.
Download
- PhoneTool x50 + patched dwdio.dll
- [PhoneTool x60]
Installation
- x50: install, replace
dwdio.dllin the installation directory with the patched one, use it. - x60: extract, import
x60factory-registri.zip\m\m\x60.reginto the registry, use it.
Usage
After launch, specify the required COM port in Settings.
Connect using the Update info button; if it does not work on the first try, press the V24 AT# on/off buttons a few times.
Dumping the contents of the flash chip
This can be done on both Linux and Windows using any cable (USB or UART). First, put the phone into PTEST.
Arch Linux
yay -S pnpm
git clone https://github.com/siemens-mobile-hacks/node-sie-serial
cd node-sie-serial/
pnpm i
npx tsx examples/dwd-apoxi-memory-dump.js \
  --addr 0xA0000000 \     # Memory address where the device flash memory begins
  --size 0x4000000 \      # Read length, 64 megabytes
  --out ./sa7-vq24.bin \  # File name where the contents will be saved
  --port /dev/ttyACM0     # Device path
Windows
- https://scoop.sh/
- https://git-scm.com/downloads/win
scoop bucket add mainscoop install main/nodejscorepack enablegit clone https://github.com/siemens-mobile-hacks/node-sie-serialcd node-sie-serialpnpm inpx tsx examples/dwd-apoxi-memory-dump.js --addr 0xA0000000 --size 0x4000000 --out .\sa7-vq24.bin --port COM7
Bootloader unlock
Likewise, this is possible on both Linux and Windows using any cable (USB or UART). Performed in PTEST. Required to enable writing flash memory to the phone using V_Klay or x65flasher.
Linux
cd node-sie-serialnpx tsx examples/dwd-apoxi-unlock-boot.ts --port /dev/ttyACM0
Windows
cd node-sie-serialnpx tsx examples\dwd-apoxi-unlock-boot.ts --port COM7
Writing flash memory
Possible only over UART.
In short: install V_Klay, place pmb8875_test_point.vkd into its Program Files\Vi-Soft\V_Klay\loaders\ folder, and after selecting this loader, connect to the phone at 115200 for writing or 921600 for reading.
With x65flasher it is somewhat simpler: select the loader "Phone with entered SKEY" and use the same speeds.
Flashing a newer software version
Possible only over UART. First, make a backup of your EEPROM because it contains radio path and battery calibrations. This can be done using PhoneTool x50 by specifying the EEPROM configuration file (for VS7/SA7/MX7 this is leopard_eep150.cfg). After saving the EEPROM backup, download the dump of the required version and write it to the phone using x65flasher or V_Klay. Then connect the phone to PhoneTool x50 again and import the previously saved EEPROM dump into it.